

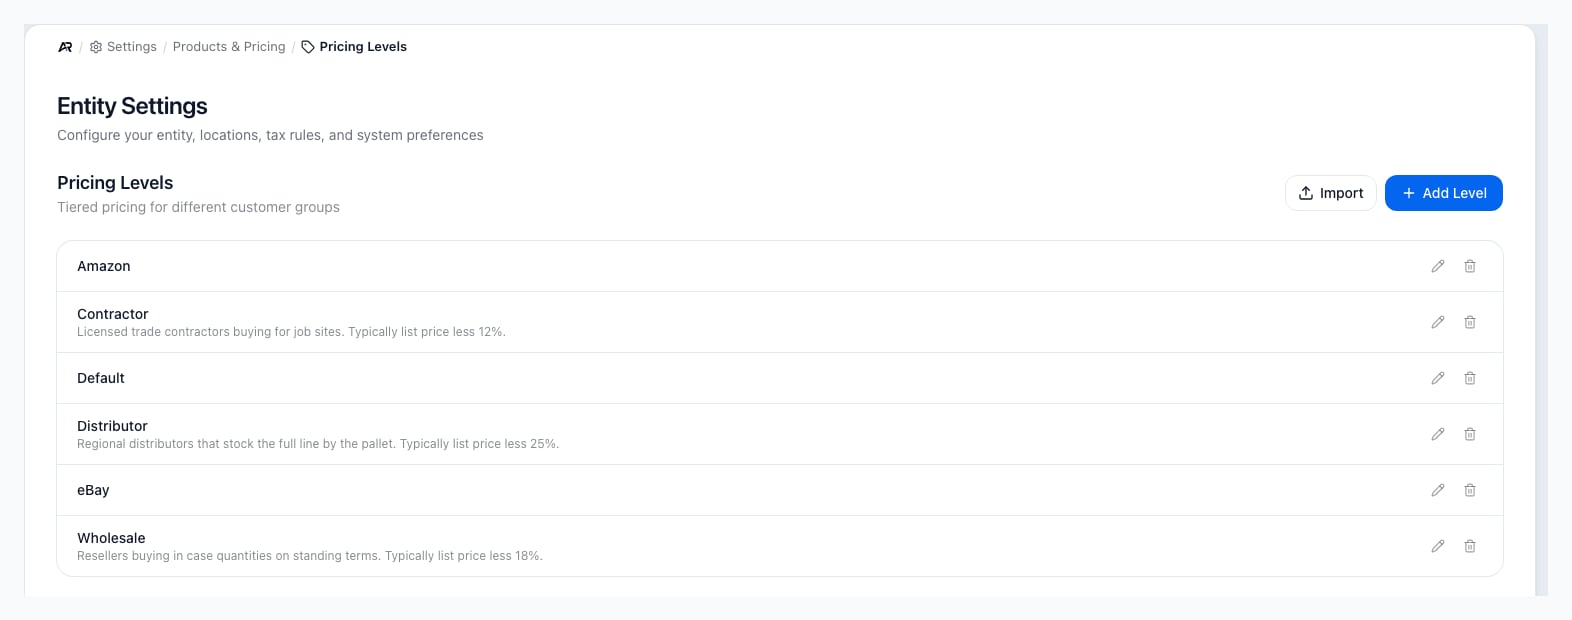
The Pricing Levels screen in Settings.
Before You Start
- You need the settings.view permission to open the page.
- You need settings.edit to add, edit, delete, or import levels. Without it, Import, Add Level, and the edit and delete buttons are disabled, and pointing at one shows “You need the ‘Edit Settings’ permission to perform this action. Ask your admin in Settings > Users.” The server refuses adding, editing, and deleting a level for a role without settings.edit, with “Permission denied: settings.edit”.
Open Pricing Levels
- In the deck, open Settings.
- Under Products & Pricing, choose Pricing Levels.
The Level List
The list shows each level’s name, in alphabetical order, with its description underneath when it has one. Each row has an edit button (the pencil) and a delete button (the trash can). When you have no levels, the list reads “No pricing levels configured”.Add Or Edit A Level
- Click Add Level, or the edit button on a row. The Add Pricing Level or Edit Pricing Level dialog opens.
- Enter the Name. Keep it short and plain: people see it when they choose a level on an account or an order.
- Optionally enter a Description.
- Click Create or Update. The button stays disabled until the level has a name.
Import Levels
- Click Import. The Import Pricing Levels dialog opens: “Upload a CSV file to bulk import pricing levels”.
- Click Download Sample CSV for a file with the right columns: Name (required), and optionally Description and Active (true or false).
- Drop your CSV on the upload area, or click it to browse. A preview shows the rows and marks any row with a problem, such as a missing name.
- Click Import N valid rows, where N is the number of rows without a problem.
Delete A Level
- Click the delete button on the row.
- The Delete Pricing Level dialog asks “Are you sure you want to delete” the level, and warns that this cannot be undone.
- Click Delete.
Messages You May See
What Changes Elsewhere
- Product pricing: each product’s Pricing tab sets a sell price per level, with quantity breaks. That is where a level gets its prices.
- Accounts and sales channels: an account or a sales channel can name a default level, which preselects it on new orders.
- Orders: an order records the level it was priced at.
- Coupons: a rule on Adjustments & Coupons can be restricted to customers on certain levels.
- Shopify imports: the Shopify connector’s sync settings can name the level that new accounts and new orders imported from your store start on.
- Accounting and stock: nothing posts and no stock moves when you change a level.
- Audit trail: creating, editing, deleting, and importing levels is recorded in the activity log.
- Other open sessions: people who already have this page open see your change after they reload it.
Related Settings Pages
The other pages under Products & Pricing are Categories, Brands / Manufacturers, Units of Measure, Manufacturing and Adjustments & Coupons. A sales channel’s default level is set on Settings > Sales Channels > Sales Channels.Related Articles
Pricing Rules
Set what each pricing level pays on a product, with quantity breaks.
Sales Channels and Portal
Give a sales channel a default pricing level.
Adjustments & Coupons
Restrict a discount or fee rule to customers on certain levels.
Products and Pricing Settings
Review the other lists under Products & Pricing.