

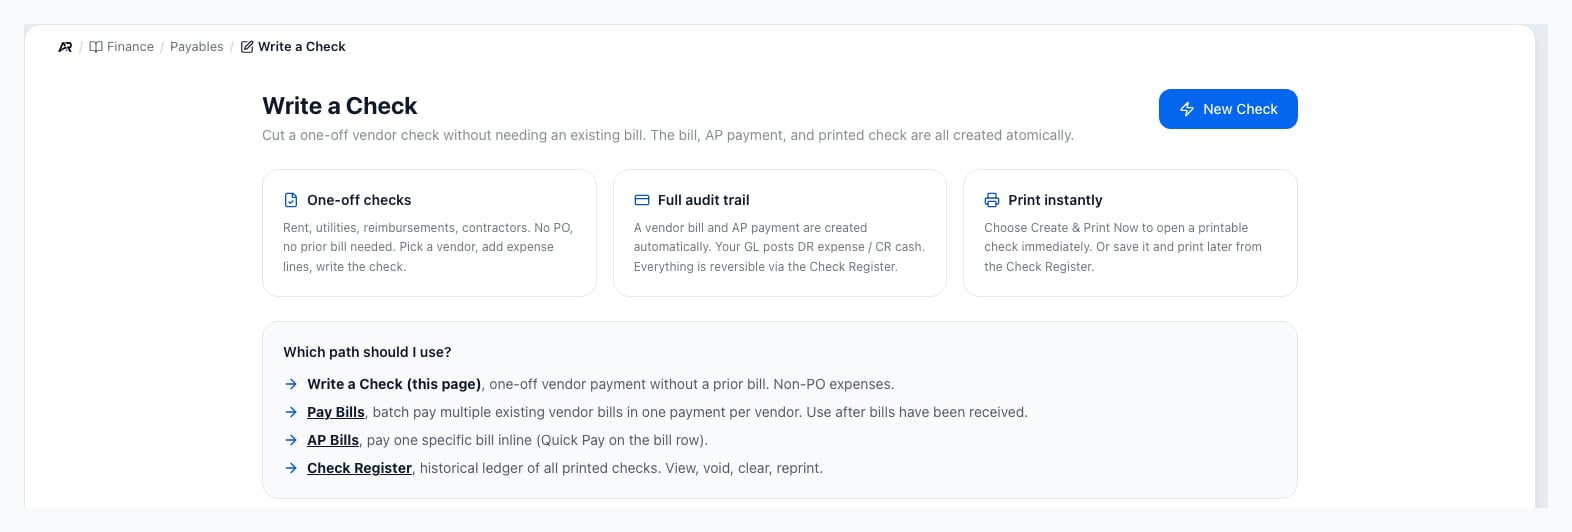
The Write a Check landing screen, with the New Check button and the one-off check workflow.
What Write a Check Does
Write a Check creates the AP record, payment record, and printable check in one guided flow. It is designed for non-PO expenses such as rent, utilities, reimbursements, services, and other vendor payments that should be expensed immediately.- Use it for one-time vendor checks without an existing bill.
- Use Pay Bills when you need to pay open vendor bills already in AP.
- Use AP Bills when you need to record and review a bill before payment.
- Use Check Register to print later, reprint, void, or clear checks.
Before You Start
- You need the Post Journal Entries permission to open Write a Check and create checks. The lists it reads (vendors, bank accounts, expense accounts) also need View Accounting, which roles that can post already have.
- Confirm the payee exists as an active vendor account.
- Confirm the check date is today or earlier, in an open accounting period and in an unlocked tax year. A date further back than your company’s backdate window needs a reason from someone holding the Close Period permission, and a date ahead of today is always refused (see Choose the Check Date).
- Choose the correct expense or allowed AP line GL account for each line.
- Confirm check numbering, check layout, and print settings are configured.
- Select a bank account when your team wants the check tied to a specific bank setup.
- Confirm whether your AP approval threshold requires manager review before the check can be issued.
Create a Quick Check
- Open Finance > Payables > Write a Check. You can also search for Write a Check in the command palette, or use its shortcut on your Home screen.
- Click New Check to open Quick Check. The page also has a Which path should I use? guide with links to Pay Bills, AP Bills and the Check Register. The next check number is shown; if it cannot be read, the number is still assigned when the check is created.
- Select the vendor in Pay To.
- Confirm the check date.
- Select a bank account if needed.
- Add a memo when it should appear on the check or help AP review.
- Add one or more expense lines with GL account, description, and amount. Use Add Line for more; Remove line is disabled when only one line is left.
- Click Review. If your expense accounts cannot be read, a notice above the lines says so and the check cannot be written until they load; use its retry. With no company selected the form says No entity selected. Select an entity to create a quick check.
Choose the Check Date
The check date is also the date the expense posts to the general ledger, and the date the check is paid. It defaults to today.- Inside your company’s window (set in Settings > System > Fiscal Year, 180 days back by default): the check is created as usual.
- Further back than the window: a dialog titled Quick check: the posting date is past the backdate window opens and nothing is created. If you hold the Close Period permission it asks for a reason of at least four characters, recorded on the audit trail, and the button Create with this reason creates the check. Without the permission the dialog says the date needs a permission you do not have and offers Close. The check still has to land in an open accounting period.
- Ahead of today: a dialog titled Quick check: the posting date is past the forward window (or has not arrived yet) opens and nothing is created. A quick check cannot be dated ahead: its check is paid on the date it carries, so there is no reason box and no override, even for someone who can close periods. Pick today or an earlier date, or record a bill dated ahead from AP Bills and pay it when it is due.
- In a closed period: the dialog says the period is closed, and when there is one offers a Use button with the next open period’s start date. Reopen the period from Period Close, or pick another date.
- In a locked tax year: the dialog says the tax year is locked. An owner can unlock it from Finance > Payables > 1099 Vendors, or pick a date in an unlocked year.
Review Before Creating
The review step is the last checkpoint before Arcus creates accounting activity. Confirm the vendor, total, date, bank account, memo, and expense lines.- Click Back if anything needs correction.
- Click Create & Print Later when the check should be created but printed later.
- Click Create & Print Now when the printable check should open immediately.
Print or Continue After Creation
After the check is created, the success card gives you three choices: print the check, open the Check Register, or write another check.- Print Check: opens the printable check.
- Open Check Register: takes you to the register for later review, print, void, or clear actions.
- Write Another: starts another quick check.
Approval Thresholds
If the check amount exceeds your AP approval threshold, Arcus can route the related bill for approval instead of issuing the check immediately, and says the check requires manager approval before it is issued. The threshold is set in Settings > System > Approval Workflows. In that case, review the pending AP bill and wait for approval before the payment is issued.Approvals protect higher-risk checks
Approval behavior depends on your entity settings and the user’s permissions.
If a check is deferred, an approver should review the AP bill before the check is issued.
What Arcus Updates
- Creates the vendor AP record for the check expense.
- Records the outgoing payment when the check is issued, and posts the expense and the payable to the general ledger on the check date, with the payment going through check clearing.
- Adds the printable check to Check Register.
- Updates AP aging and check history for later review. The bill’s activity history records the posting date the check used, and any posting-date reason you gave.
- Other users see the check list and AP lists refresh.
- Keeps void, clear, and reprint work in Check Register.
Common Blocks
- Review is disabled: select a vendor, check date, valid GL account, and positive line amount.
- Vendor is not found: confirm the payee account is active and marked as a vendor.
- GL account is not available: choose an allowed AP expense-line account.
- Check date is blocked: see Choose the Check Date. A closed accounting period also shows The selected check date is in a closed accounting period. Pick a date in an open period.
- Print did not open: allow popups for Arcus, then print from the Check Register.
- Check was not issued immediately: the amount may require AP approval first.
- No check counter configured: an administrator needs to configure check numbering for this entity before a check can be created.
- No Check Clearing account configured: Arcus refuses to create the check and asks you to add a Check Clearing account in the Chart of Accounts (Finance > General Ledger > Chart of Accounts) first.
- No Accounts Payable GL account is configured: add the account in the Chart of Accounts, then try again.
- You do not have permission to issue checks: ask an administrator for the Post Journal Entries permission, then retry.
- The server hit an unexpected error creating the check. This is safe to retry.: a temporary failure; the message offers a retry and the same submission is never created twice.
- Correction is needed after creation: use Check Register actions such as void, then recreate the check if needed.
Related Articles
Pay Bills and Print Checks
Pay open vendor bills by check, ACH, ACH file, wire, or cash.
Check Register and AP Checks
Print, batch print, clear, void, and audit vendor checks.
1099 Vendors
Review flagged vendors, W-9 status, tax-year totals, downloads, and locks.
AP and Bill Pay
Record vendor bills, approve them, post them, and track AP aging.
Recurring Bills
Create scheduled vendor bill templates, pause runs, allocate GL splits, and review history.
Fiscal Year
Set the backdate and future posting windows that decide which check dates need a reason.
Chart of Accounts
Understand account structure, account types, and posting behavior.